Skip to Content
chevron-left chevron-right chevron-up chevron-right chevron-left arrow-back star phone quote checkbox-checked search wrench info shield play connection mobile coin-dollar spoon-knife ticket pushpin location gift fire feed bubbles home heart calendar price-tag credit-card clock envelop facebook instagram twitter youtube pinterest yelp google reddit linkedin envelope bbb pinterest homeadvisor angies

How to Choose the Right Biosafety Isolator?

Choosing the right Biosafety Isolator is not simply a matter of comparing prices, sizes, or airflow numbers. It is a risk-based decision shaped by the material, process, operator, facility, and maintenance plan. A unit that looks impressive may still fail operationally if gloves feel stiff, transfer ports are awkward, or cleaning takes too long. Small inconveniences become serious weaknesses during a busy shift.

James Reason, a leading safety and human-factors expert, wrote, “We cannot change the human condition, but we can change the conditions under which people work.” His observation fits Biosafety Isolator selection closely. Effective containment depends on equipment design and human behavior. Door seals, pressure stability, filtration, leak testing, alarm visibility, and ergonomic access all deserve practical examination. So does the service record.

A useful evaluation begins with the intended application. Will the isolator support aseptic compounding, animal research, toxic materials, or high-containment laboratory work? Each purpose can require different pressure modes, glove systems, transfer arrangements, and decontamination methods. Reviewers should request performance data, user training details, validation support, and realistic maintenance procedures. Ask technicians to test the gloves.

The decision is rarely perfect. A quieter system may offer weaker flexibility, while a highly automated model can introduce complicated repairs. That trade-off needs honest discussion. Site conditions also matter, including room pressure, utilities, operator movement, and emergency access. This guide examines those details carefully, helping readers choose a Biosafety Isolator that supports reliable containment rather than merely satisfying a specification sheet.

How to Choose the Right Biosafety Isolator?

Biosafety Isolators: Purpose, Structure, and Core Functions

How to Choose the Right Biosafety Isolator?

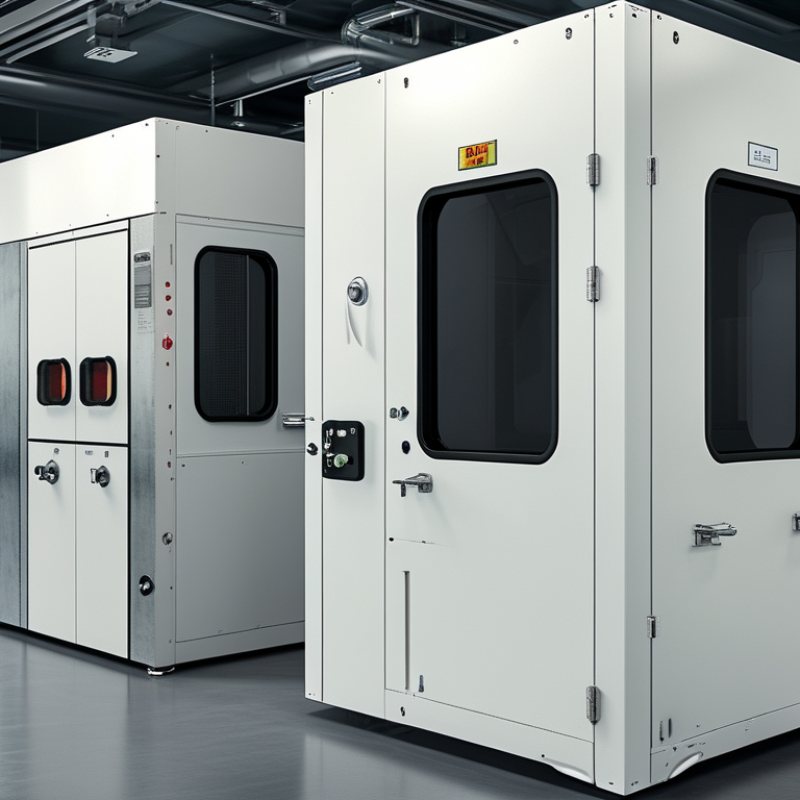
A biosafety isolator creates a controlled barrier between operators, materials, and the surrounding room. Its purpose is simple: contain hazards and reduce exposure during handling. The structure usually includes a sealed work chamber, glove ports, transparent panels, transfer systems, and filtered airflow. Negative pressure helps keep contaminated air inside. HEPA filtration supports cleaner exhaust air. It does not replace proper procedures.

Core functions should match the work, not just the equipment list. Check containment performance, airflow stability, pressure alarms, surface cleanability, and transfer efficiency. A narrow chamber may limit movement when using forceps or small instruments. A poorly placed glove port can cause shoulder strain after repeated tasks. Operators should test the isolator with realistic containers, cleaning tools, and working postures. In routine facility assessments, small usability problems often become larger safety risks. No design is perfect.

Tips: Define the process before selecting the isolator. Record material sizes, transfer frequency, cleaning agents, and required observation areas. Ask qualified specialists to verify installation, airflow, filter integrity, and alarm function. Keep maintenance access practical. A sophisticated system may still underperform if users cannot clean corners or respond quickly to alarms. Reviewing these weaknesses early is valuable, even when the design appears complete.

How to Choose the Right Biosafety Isolator?

Biosafety Isolators: Purpose, Structure, and Core Functions

HEPA filtration is a core function of many biosafety isolators. The values shown are published minimum filtration-efficiency ratings measured under specified test conditions. H13 and H14 classifications are defined by EN 1822 at the most penetrating particle size, while the U.S. Department of Energy benchmark specifies 99.97% efficiency at 0.3 micrometers. Filter efficiency alone does not determine isolator suitability: selection should also consider negative or positive pressure, airtight construction, glove access, decontamination requirements, airflow monitoring, and the biological risk assessment.

Define the Required Containment Level and Risk Controls

Choosing a biosafety isolator starts with a documented risk assessment. Identify the agent, concentration, volume, exposure route, and procedure. Aerosol-generating steps need stronger controls than closed transfers. The WHO Laboratory Biosafety Manual, 4th edition, recommends risk-based control selection rather than relying on fixed containment labels. The CDC/NIH BMBL, 6th edition, describes four biosafety levels, but the level alone does not define every isolator specification.

Translate the assessment into measurable controls. Specify inward airflow, pressure differentials, HEPA filtration, glove-port integrity, transfer-chamber design, and validated decontamination. For powders, droplets, or repeated manipulations, observe operator movement and material flow during a realistic trial. A 2023 laboratory safety review in Applied Biosafety notes that human factors remain a major source of containment weakness. That finding deserves attention. A technically excellent isolator can still fail through poor loading habits, unclear alarms, or rushed maintenance.

Tips: Create a risk-control matrix before requesting quotations. Record the required pressure range, alarm response time, filter test method, and cleaning cycle. Ask operators to test the layout with empty containers first. Review the result with an independent biosafety professional. I would also challenge the initial specification after commissioning. Real workflows often expose problems that drawings hide.

Compare Isolator Designs, Materials, and Airflow Systems

Choosing a biosafety isolator starts with the process, not the enclosure. Softwall systems offer flexibility and lower installation costs, while hardwall isolators provide stronger structural control and easier decontamination. Glovebox designs suit closed, high-containment manipulations. Open-front systems may support better access, but they demand carefully validated airflow.

Materials affect durability. PVC film is lightweight and practical for temporary operations, yet it can scratch or weaken after repeated chemical exposure. Stainless steel offers a smoother, more cleanable surface, although seams and welds need inspection. The WHO Laboratory Biosafety Manual, 4th edition, emphasizes risk assessment, validated containment, and routine maintenance. That guidance matters more than attractive specifications. No material is perfect.

Airflow is the critical comparison. Negative pressure helps prevent contaminated air from escaping, while HEPA filtration supports particle control. ISO 14644-1:2015 defines ISO Class 5 air cleanliness as no more than 3,520 particles of 0.5 micrometers or larger per cubic meter. However, particle cleanliness does not prove biological containment. Test both. In practice, smoke studies, pressure alarms, filter integrity tests, and recovery testing reveal weaknesses that brochures often hide.

Tips: Match airflow direction to the hazard. Check glove ergonomics with real operators. Review chemical compatibility before purchase. Leave space for maintenance. I would also challenge the first design choice; a technically sound isolator can still fail when users work around it.

Assess Decontamination, Monitoring, and Operational Requirements

How to Choose the Right Biosafety Isolator?

Choosing a biosafety isolator requires more than checking containment specifications. Decontamination performance should match the materials, organisms, and cleaning agents used in daily work. Ask how the chamber reaches every surface, including corners, glove ports, transfer areas, and equipment undersides. A clean-looking chamber can still contain hidden residue. Details matter.

Review the complete decontamination cycle, not only the advertised cycle time. Confirm how chemical concentration, temperature, humidity, exposure time, and aeration are monitored. Independent chemical indicators can support routine checks, while biological indicators may provide stronger cycle verification when appropriate. Records should be clear, traceable, and protected from casual editing. Alarm history also deserves attention. A missed alarm can reveal a weak operating habit, not merely a technical fault.

Operational requirements often decide whether an isolator succeeds after installation. Check glove comfort, visibility, loading height, pass-through capacity, and filter replacement access. Confirm that the isolator maintains the required pressure and airflow during normal use, door opening, and brief disturbances. Staff should be able to understand alarms without guessing. In practice, teams sometimes choose complex systems that slow routine work. That is an uncomfortable lesson. A slightly less elaborate design may support better compliance when cleaning, monitoring, maintenance, and training fit the real workflow. A documented risk assessment should guide the final choice.

Select the Isolator That Fits Your Facility and Workflow

How to Choose the Right Biosafety Isolator?

Select an isolator around your facility and workflow, not around a catalog specification. The WHO Laboratory Biosafety Manual, fourth edition, recommends a risk-based approach before choosing containment controls. Map each task: material loading, manipulation, sampling, waste removal, and decontamination. A compact isolator may suit low-throughput work, while a larger chamber can reduce repeated transfers. However, larger is not always better. It can increase cleaning time, glove reach, and operator fatigue.

Air cleanliness must match the process. ISO 14644-1 lists a maximum of 3,520 particles per cubic meter at 0.5 micrometers for ISO Class 5 air. EU GMP Annex 1 uses the same 0.5-micrometer limit for Grade A conditions. These figures matter, but they do not replace airflow visualization or leak testing. Watch the smoke pattern near glove ports and transfer doors. Dead zones can appear during real work. They are easy to miss during acceptance testing.

Review the room itself. Check pressure cascades, power capacity, ventilation connections, service access, and emergency procedures. The workflow should feel natural with gloves attached. Operators should not twist repeatedly to reach trays or waste ports. Cleaning agents also need compatibility checks with gloves, seals, windows, and internal surfaces. A practical trial with the actual load is valuable. Still, one trial cannot predict every shift. Record failures, awkward movements, and cleaning delays before final selection.

How to Choose the Right Biosafety Isolator? – Select the Isolator That Fits Your Facility and Workflow

Selection Dimension Typical Options Best-Fit Use Case Primary Protection Objective Workflow and Facility Requirements Key Advantages Important Considerations
Pressure Regime Positive-pressure isolator
Internal pressure is maintained above the surrounding room.
Sterile or low-bioburden processing where the product must be protected from room contamination. Product and process protection. Requires controlled airflow, pressure monitoring, leak management, and an appropriately classified surrounding area. It is generally unsuitable for unknown or hazardous biological materials because leakage can move contaminants outward.
Pressure Regime Negative-pressure isolator
Internal pressure is maintained below the surrounding room.
Handling of hazardous, infectious, sensitizing, or toxic biological materials. Operator, environment, and facility protection. Needs dedicated exhaust treatment, pressure alarms, validated containment, and safe filter-change procedures. Airflow failure, glove damage, door opening, or poor transfer practice can compromise containment; emergency response must be defined.
Enclosure Configuration Closed isolator
Materials enter and leave through designed transfer systems while the main chamber remains closed.
Repetitive, high-containment, or highly controlled operations with standardized material flows. Strong separation between the process and the surrounding environment. Requires validated transfer chambers, rapid-transfer ports, pass-through systems, or other controlled interfaces. Transfer-cycle time and decontamination capacity can become workflow bottlenecks if undersized.
Enclosure Configuration Open isolator
One or more controlled openings are used during routine processing.
Processes requiring frequent access, manual intervention, or fast material movement. Product protection, containment, or both, depending on airflow and pressure design. Requires carefully designed openings, airflow control, operator training, and defined access procedures. Openings create additional contamination and containment risks; the design should be supported by airflow studies and documented operating limits.
Biological Risk Low-risk or non-hazardous biological materials Media preparation, sterile manipulations, non-hazardous cell work, or controlled product handling. Usually product protection, with personnel protection determined by the material and process. Confirm the applicable biosafety level, contamination-control strategy, and room classification. A biosafety isolator should not be selected solely by process name; the hazard assessment must consider aerosols, organisms, quantities, and procedures.
Biological Risk Infectious or potentially infectious materials Diagnostic, research, or production activities involving agents that may present a biological hazard. Personnel and environmental protection, with product protection added when required. Requires a documented risk assessment, appropriate exhaust strategy, validated decontamination, and an approved operating procedure. The isolator must be compatible with the required biosafety level and institutional controls; it does not replace all facility-level safeguards.
Aseptic Requirement High aseptic control Sterile compounding, aseptic filling, sterile sampling, and other processes where product contamination must be minimized. Product sterility and protection from particulate and microbial contamination. Consider HEPA-filtered supply air, unidirectional airflow where justified, validated cleaning, material flow, and personnel practices. Air cleanliness alone does not demonstrate sterility assurance; cleaning, disinfection, environmental monitoring, and process validation remain necessary.
Decontamination Method Vaporized hydrogen peroxide or another validated gaseous method Enclosures that require periodic whole-chamber decontamination between campaigns or after a contamination event. Reduction of viable contamination on accessible internal surfaces. Requires compatible materials, sealed-volume qualification, validated concentration and exposure cycles, aeration, and residue controls. Cycle duration, material compatibility, sensor placement, and aeration time may affect throughput.
Material Transfer Pass-through chamber, rapid-transfer port, or integrated transfer hatch Facilities with frequent movement of tools, samples, containers, or waste into and out of the isolator. Preservation of pressure differential and reduction of cross-contamination during transfers. Transfer dimensions, cycle time, interlocks, decontamination method, and loading sequence must match the actual workflow. The transfer system may limit container size, packaging formats, and the number of simultaneous operations.
Glove and Sleeve Access Fixed glove ports, sleeve systems, or remotely operated tools Manual manipulations requiring direct access while maintaining a physical barrier. Separation between the operator and the process environment. Select glove materials and port positions according to chemicals, biological agents, reach envelope, dexterity, and ergonomic needs. Gloves are consumable containment components; inspection, replacement intervals, leak testing, and spare-glove access should be defined.
Facility Integration Recirculating air, single-pass exhaust, or dedicated exhaust connection Facilities with different HVAC capacities, exhaust arrangements, and hazardous-air requirements. Stable pressure control and safe management of filtered or potentially contaminated air. Verify room pressure cascade, exhaust capacity, heat load, electrical supply, floor loading, ceiling height, and service access. A design that works in isolation may fail if the facility cannot maintain the required airflow, pressure, or exhaust conditions.
Compliance and Validation Risk assessment, qualification, and performance verification Any regulated, hazardous, or contamination-sensitive operation. Demonstrable and repeatable performance. Plan design qualification, installation qualification, operational qualification, leak testing, airflow testing, filter integrity testing, alarm testing, and decontamination validation as applicable. Applicable requirements vary by jurisdiction and application; standards and institutional biosafety procedures should be reviewed before procurement.
Workflow Fit Manual, semi-automated, or fully integrated operation Facilities choosing between flexible operator access and higher automation. Reliable containment and consistent process execution. Map each step, including setup, sampling, cleaning, waste removal, maintenance, interruptions, and emergency actions. A technically capable isolator may still be unsuitable if glove-port positions, chamber size, transfer cycles, or cleaning steps slow routine work.
Selection principle: Start with a documented hazard and workflow assessment. Then define the required pressure regime, enclosure configuration, transfer method, decontamination strategy, facility interfaces, and validation plan before comparing equipment specifications.