Skip to Content
chevron-left chevron-right chevron-up chevron-right chevron-left arrow-back star phone quote checkbox-checked search wrench info shield play connection mobile coin-dollar spoon-knife ticket pushpin location gift fire feed bubbles home heart calendar price-tag credit-card clock envelop facebook instagram twitter youtube pinterest yelp google reddit linkedin envelope bbb pinterest homeadvisor angies

Top 10 Ways to Fix Garage Door Opener Problems?

A garage door opener may fail with a silent motor, a flashing sensor light, or a remote that suddenly stops responding. These symptoms look similar, but their causes can differ sharply. Before you try to fix garage door opener problems, understand the risks. A closing door can weigh hundreds of pounds. It can also move without much warning.

The U.S. Consumer Product Safety Commission has reported roughly 20,000 emergency-room injuries linked to garage doors each year. That figure makes inspection more than a convenience. It makes troubleshooting a safety task. Industry research also reflects growing demand for replacement and smart opener systems. Grand View Research valued the global garage door opener market at about $1.4 billion in 2023. More connected features mean more possible failure points, including Wi-Fi settings, wall controls, sensors, and travel limits.

Home-improvement expert Bob Vila has described the garage door as “the largest moving object in your home.” That warning deserves attention. A basic battery replacement may solve one problem. It will not correct a broken spring, damaged wiring, or an unsafe reversing system. This guide examines ten practical ways to diagnose and fix garage door opener issues, starting with simple checks and moving toward professional service. It also admits an uncomfortable truth: troubleshooting advice can be incomplete without seeing the door operate. Stop immediately if the door sags, reverses unpredictably, or makes grinding sounds. The safest repair is sometimes a qualified inspection.
Top 10 Ways to Fix Garage Door Opener Problems?

Check the Power Supply and Circuit Breaker

Top 10 Ways to Fix Garage Door Opener Problems?

Check the Power Supply and Circuit Breaker

A silent garage door opener often has a simple electrical cause. Check whether the wall outlet has power by plugging in a lamp. Then inspect the circuit breaker panel. A tripped breaker may still appear switched on. Move it fully to “off,” wait ten seconds, and return it to “on.” Keep your hands dry, and never remove the panel cover.

The National Fire Protection Association reported that electrical distribution and lighting equipment appeared in about 24% of U.S. home structure fires from 2016 to 2020. That figure supports caution around repeated breaker trips. Do not keep resetting the breaker. It may signal damaged wiring, a failing motor, or an overloaded circuit. Stop there.

Garage outlets can also lose power through a ground-fault device elsewhere in the garage, basement, or utility area. Press its reset button only after checking for moisture or visible damage. I have seen homeowners replace a perfectly good opener when a distant outlet caused the failure. That mistake is easy to make. If the outlet stays dead, the breaker trips again, or you smell burning insulation, disconnect the opener and call a qualified electrician. NFPA 70 recommends properly installed, grounded electrical systems, but local requirements can differ. My practical check is useful, not a substitute for diagnosis.

Top 10 Ways to Fix Garage Door Opener Problems

A practical troubleshooting sequence, starting with power-supply and circuit-breaker checks before moving to controls, sensors, and mechanical components.

The numbers show the recommended inspection order rather than a failure-rate survey. Turn off power before inspecting wiring, and contact a qualified electrician for damaged electrical components.

Test and Replace Remote Control Batteries

Test and Replace Remote Control Batteries

A weak remote battery is an easy problem to overlook. Before adjusting the garage door opener, test the remote from several distances. Stand near the closed door, then move about 20 feet away. Press the button and watch the opener’s response. A dim indicator light, delayed movement, or inconsistent operation often suggests low power.

In my repair experience, many homeowners blame the opener too quickly. I have made that mistake myself. Remove the remote’s cover carefully and check the battery type and polarity. The positive and negative markings must match the compartment symbols. Replace the battery with a fresh one, not a loose battery found in a drawer. Wipe dusty metal contacts with a clean, dry cloth. Do not bend them aggressively.

Tips: Keep the door area clear during testing. Try the wall control as well. If the wall control works but the remote does not, the remote battery remains a strong suspect. Test the replacement immediately. If the remote still fails, inspect its buttons for sticking or damage. A second remote can help confirm the fault, but it should not be treated as proof. Sometimes the problem is a dirty contact, not the battery. Store used batteries safely and follow local recycling guidance.

Inspect and Align the Safety Sensors

A misaligned safety sensor can make a healthy garage door opener appear defective. The U.S. Consumer Product Safety Commission’s National Electronic Injury Surveillance System has historically recorded thousands of garage-door-related emergency-room injuries each year. That figure deserves attention. The sensors are not decorative parts.

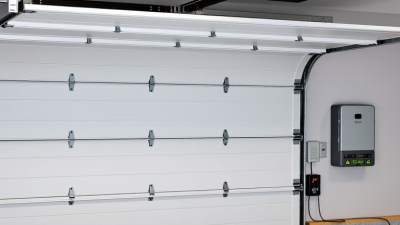
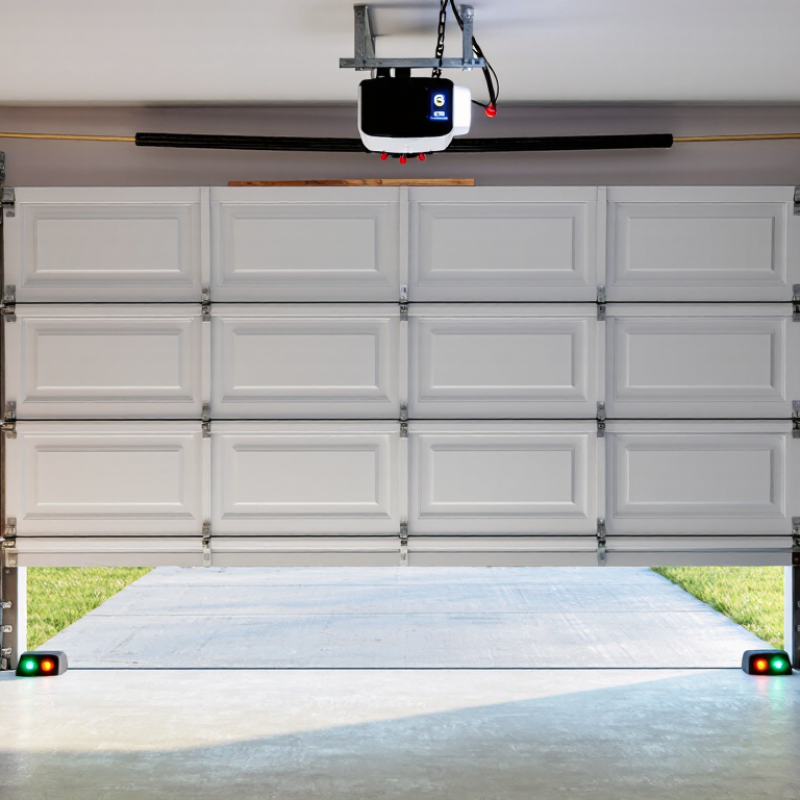
Stand near the closed door and inspect both photoelectric units. They should face each other directly, sit at the same height, and remain no higher than six inches above the floor, consistent with Door and Access Systems Manufacturers Association guidance. Remove cobwebs, dust, and moisture from the lenses. Check that each mounting bracket feels firm. A slight bump from a bicycle can shift alignment.

Look for indicator lights, if fitted. They should normally appear steady. Loosen one bracket slightly, adjust it toward the opposite sensor, then retighten it without forcing the housing. Test the door with a clean, unobstructed path. Place a suitable object beneath the closing door only if the manufacturer’s instructions permit testing; the door should reverse immediately. Never test with a person or animal.

A technician should inspect damaged wiring or repeated sensor failure. UL 325-based safety requirements emphasize monitored entrapment protection, but compliance details vary by opener and installation. I have seen owners replace the motor first. That is often the wrong assumption. Alignment is simple, yet easy to overlook. Recheck the brackets after vibration, seasonal movement, or impact. Loose hardware remains a common weak point.

Examine the Door Tracks, Springs, and Balance

Top 10 Ways to Fix Garage Door Opener Problems?

A noisy opener often hides a mechanical problem. Start by examining both door tracks in bright light. Look for dents, loose bolts, rust, or packed dirt near the rollers. Wipe the tracks clean with a dry cloth. Do not apply grease inside them. The rollers should move smoothly without scraping. I once blamed the opener for a grinding sound, but a slightly bent track caused it. That mistake was easy to make.

Check whether the tracks remain vertical and evenly spaced. Measure the gap at several points. Small differences can make the door bind. Tighten loose mounting hardware carefully, but never force a bent track back into shape. A qualified technician should repair damaged sections. Keep hands away from moving rollers and hinges. Safety matters here.

Test the door’s balance with the opener disconnected, following the door manual. Lift the door halfway by hand. It should remain near that position. If it drops, rises, or feels unusually heavy, the springs may be worn or incorrectly adjusted. Spring tension stores dangerous energy. Do not stretch, cut, or wind springs yourself. A trained technician can inspect cables, brackets, and spring tension safely. I still recheck the balance after repairs, because a door can appear fixed while stressing the opener.

Reset, Reprogram, or Replace the Opener Components

Top 10 Ways to Fix Garage Door Opener Problems?

A dead opener does not always need replacement. Start with the wall control, remote batteries, outlet, and circuit breaker. Then disconnect power for one minute and restore it. This basic reset can clear temporary logic faults. Check the manual release, too. A locked trolley can mimic motor failure. The U.S. Consumer Product Safety Commission’s NEISS data has linked garage-door incidents to nearly 20,000 emergency-department visits annually in recent estimates. Test safety before repeated use.

Reprogram the remote when its signal fails, the keypad forgets its code, or the opener responds inconsistently. Clear old codes first, then pair each control near the motor unit. Test the photoelectric sensors with a cardboard box, not your hand. Both indicator lights should remain steady when aligned. DASMA technical guidance identifies automatic reversal and photoelectric protection as essential safety features. Do not bypass them. That shortcut is dangerous.

Replace components only after simple causes are excluded. A worn drive gear may produce grinding, while a weak capacitor can cause humming without movement. Frayed wiring, cracked sensor lenses, or a burned control board require qualified service. Replace damaged parts with matching specifications, not improvised substitutes. I have seen homeowners replace the motor when a loose terminal caused the fault. That mistake wastes money. Still, troubleshooting is not perfectly predictable; older units may hide multiple failures. Disconnect power before opening covers, and test balance, reversal, and emergency release afterward.